Saturday, 8 May 2021

Add Disqus Comments widget on Blogger.

#How to add Disqus Comments widget on Blogger?


add Disqus Comments widget on Blogger.

Install Loading Disqus on Scroll on Blogger ? (New Version in 2021)

Hey my Blogger Friends, Welcome to my new post on How to Install Fully Responsive Lazy Loading Disqus on Scroll on Blogger for free in 2021.
Here are you know how to implement it with very easy step .


Let's Start our Blogspot Widgets,

How to Install Lazy Loading Disqus on Scroll on Blogger ? (New Version in 2021)

Disqus is an online platform that provides a comment system that you can use on various website platforms, using Disqus comments is now the best choice because it has better features compared to the default comment system on Blogger. Including Disqus you will see Facebook, Twitter and Instagram Comments easily.And This is Trending Blogger Widgets for Free in 2021. This Disqus comment system is commonly found on sites that embed it and Many Blogger use it on their blog .

With all its advantages, there are also drawbacks because Disqus is a third party plugin, therefore Disqus will contribute to the loading load on the blog every time we open an article link and it is not Good News For Blogger. To overcome this, here CNL OFFICIAL will provides tips on How to add Lazy Loading Disqus on Scroll in Blogger 2021(Update Version) the way it works is that the Disqus code will not work until we scroll the page until the Disqus viewport is visible.

For those of you who want to apply this method on their Blogger website than  please follow the easy steps below.

#How to Install Lazy Loading Disqus on Blogger?

First, open Blogger > Click the Themes menu >Backup Your Template>Click Edit HTML and Backup Them > Then find this code


<b:includable id='comments' var='post'>

Then add the code below just below the code <b:includable id='comments' var='post'>

<b:if cond='data:view.isPost'>
<div id='disqus_thread'>
<div id='disqus_empty'/></div>
<script>
//<![CDATA[
function load_disqus(e){var t=document.getElementById("disqus_empty"),d=document.getElementById("disqus_thread"),n=document.createElement("script"),s=document.getElementsByTagName("head")[0]||document.getElementsByTagName("body")[0];d&&t&&(n.type="text/javascript",n.async=!0,n.src="//"+e+".disqus.com/embed.js",s.appendChild(n),t.remove())}window.addEventListener("scroll",function(e){var t=document.scrollingElement.scrollTop,d=document.getElementById("disqus_thread");d&&t>d.getBoundingClientRect().top-150&&(load_disqus("YOUR-DISQUS-USERNAME"),console.log("Disqus loaded."))},!1);
//]]>
</script>
</b:if>

Then Change the code marked with your blog's Disqus Username.


Next, for the CSS code, add the code below before</head>

<b:if cond='data:view.isPost'>
<style>
#disqus_thread{display:block;position:relative;overflow:hidden;padding:20px 0 0 0;margin:20px auto 0 auto;border-top:1px solid rgba(0,0,0,0.08)}#comments{display:none}
</style>
</b:if>

Then click Save theme and you're done!

Well, for those of you who want to completely remove all code from the default Blogger comment system and want to use the Disqus comment system permanently on their blogspot. You can see the video below:

Backup the theme before deleting the Blogger comment code and never try to edit this code.This code is fully responsive and user friendly.

That's the way to install Lazy Loading Disqus on Scroll that CNL OFFICIAL can share on this occasion.

 
CNL OFFICIAL is only For Blogger Widgets and Fully Responsive Template For Blogger Free. If any problems including this code or implement this code just comments and get quick solution.

Thank you for visiting and greetings.

Labels: ,

Tuesday, 4 May 2021

Email Subscription widget for Blogger.

#Popup email Subscription widget for Blogger.(new version in 2021.)


Subscription widget for Blogger.

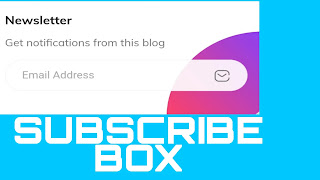
CNL OFFICIAL Now share another Blogger Responsive Widgets that is How to Create Stylish Gradient Subscribe Box on Blogger in 2021. In previous post I shared a stylish Delay loading images before scrolling pages.


Now, I made this tutorial at the request of a blogger friend who wants to install a Subscription Box on their Blogger free.

Actually, those of you who are familiar with blog coding might have no trouble finding the code on a blog page, because all the desired code will be very easily copied via Inspect Elements or Page Source from the blog page. However, as an ethical human being, asking permission is the best thing.

Immediately, here you only need to follow these simple steps.


How to create Subscription widget on Blogger?

First, open Blogger > Click the Themes menu > Click Edit HTML and Backup Them > Then find and add the code below before</head>

<style>
/* Subscribe Box */
*,*:before,*:after{-webkit-box-sizing:border-box;-moz-box-sizing:border-box;box-sizing:border-box}input,select,textarea{width:100%}#subscribe-box p{font-size:14px;color:#767676;margin:0 0 15px;padding:0;line-height:normal}#subscribe-box .emailfield{position:relative;margin:auto;z-index:1}#subscribe-box .emailfield input{background:rgba(255,255,255,.9);padding:13px 20px;color:#aaa;border:1px solid rgba(0,0,0,0.05);font-size:14px;margin-bottom:16px;border-radius:99em}#subscribe-box .emailfield input:focus{color:#222;outline:none;border-color:rgba(0,0,0,0.05);box-shadow:inset 0 0 0 3px rgba(0,0,0,0.05)}#subscribe-box .emailfield .submitbutton{display:block;position:relative;overflow:hidden;background:rgba(255,255,255,.25);color:#fff;width:100%;font-size:15px;font-weight:bold;border:0;margin:auto;box-shadow:0 2px 3px rgba(0,0,0,0.1), 0 2px 4px rgba(0,0,0,0.13);transition:all 0.2s cubic-bezier(0.4,0,0.2,1)}#subscribe-box .emailfield .submitbutton:active,#subscribe-box .emailfield .submitbutton:hover{background:rgba(255,255,255,.35);color:#fff;box-shadow:0 3px 3px rgba(0,0,0,0.1), 0 3px 4px rgba(0,0,0,0.13)}#subscribe-box .emailfield input:focus.submitbutton{color:#fff}#subscribe-box .emailfield form{position:relative}#subscribe-box .emailfield .submitbuttonlabel{position:absolute;top:3px;right:8px;display:inline;padding:8px 12.5px 8px 20px;cursor:pointer;font-size:13px}#subscribe-box .emailfield .submitbuttonlabel svg{fill:#767676;width:22px;height:22px;vertical-align:middle;transition:all .3s}#subscribe-box .emailfield .submitbuttonlabel svg:hover,#subscribe-box .emailfield .submitbuttonlabel svg:focus{fill:#568af5}#HTML98{position:relative;overflow:hidden;padding:20px;border:1px solid #fff}#HTML98:after{content:&#39;&#39;;display:block;position:absolute;bottom:0;right:0;width:120px;height:120px;background-image:linear-gradient(50deg,#ff4169,#8b41f6);background-repeat:no-repeat;border-radius:120px 0 0;transition:opacity .3s;opacity:1}#HTML98:before{content:&#39;&#39;;display:block;position:absolute;bottom:0;right:0;width:120px;height:120px;background-image:linear-gradient(230deg,#ff4169,#8b41f6);background-repeat:no-repeat;border-radius:120px 0 0;transition:opacity .3s;opacity:1}#HTML98:hover:after{opacity:0}#HTML98:hover:before{opacity:1}#HTML98 h2:after,#HTML98 h3:after,#subscribe-box .emailfield input[type=submit]{display:none}
</style>


Then click the Save theme button .


3. Then open the Layout menu> Create a New HTML / JavaScript widget> Then add the markup below in it.

<div id='subscribe-box'>
<p>Get notifications from this blog</p>
<div class='emailfield'>
<form action='https://feedburner.google.com/fb/a/mailverify' method='post' onsubmit='window.open(&apos;https://feedburner.google.com/fb/a/mailverify?uri=ArlinaCode&apos;, &apos;popupwindow&apos;, &apos;scrollbars=yes,width=550,height=520&apos;);return true' target='popupwindow'>
<input required='required' type='text' name='email' onblur='if (this.value == &quot;&quot;) {this.value = &quot;Email Address&quot;;}' onfocus='if (this.value == &quot;Email Address&quot;) {this.value = &quot;&quot;;}' value='Email Address'/>
<input class="submitbutton" type="submit" id="email-submit" value="Subscribe"/>
<label class="submitbuttonlabel" for="email-submit">
<svg class="icon" viewbox="0 0 24 24" xmlns="https://www.w3.org/2000/svg"><g transform="translate(2.000000, 3.000000)"><path d="M14.1972579,8.17124146e-14 C17.3979916,0.00978563072 19.990286,2.62120148 20,5.84554455 L20,5.84554455 L20,7.30693069 L19.99354,7.4036631 C19.9466817,7.75161611 19.6506049,8.01980198 19.2923485,8.01980198 L19.2923485,8.01980198 L19.2835029,8.0019802 L19.1721336,7.99309967 C19.0257158,7.96959451 18.889286,7.90013647 18.7831177,7.79318503 C18.6504073,7.65949573 18.5758514,7.47817413 18.5758514,7.28910891 L18.5758514,7.28910891 L18.5758514,5.84554455 C18.5518871,3.41954659 16.6054921,1.45879454 14.1972579,1.43465347 L14.1972579,1.43465347 L5.80274215,1.43465347 C3.39450789,1.45879454 1.44811291,3.41954659 1.42414861,5.84554455 L1.42414861,5.84554455 L1.42414861,12.1544554 C1.44811291,14.5804534 3.39450789,16.5412055 5.80274215,16.5653465 L5.80274215,16.5653465 L14.1972579,16.5653465 C16.6054921,16.5412055 18.5518871,14.5804534 18.5758514,12.1544554 C18.6163388,11.7890822 18.922975,11.5127474 19.2879257,11.5127474 C19.6528764,11.5127474 19.9595126,11.7890822 20,12.1544554 C19.990286,15.3787985 17.3979916,17.9902144 14.1972579,18 L14.1972579,18 L5.80274215,18 C2.599996,17.995093 0.00487110525,15.3808258 -1.42108547e-14,12.1544554 L-1.42108547e-14,12.1544554 L-1.42108547e-14,5.84554455 C-1.42108547e-14,2.61713944 2.59797615,8.17124146e-14 5.80274215,8.17124146e-14 L5.80274215,8.17124146e-14 Z M4.29443312,5.38692655 C4.48070099,5.36682207 4.6671823,5.42289927 4.81203008,5.54257426 L4.81203008,5.54257426 L8.96948253,8.85742574 C9.48880627,9.2678976 10.2192875,9.2678976 10.7386112,8.85742574 L10.7386112,8.85742574 L14.8518355,5.54257426 L14.8606811,5.54257426 L14.9473987,5.48291804 C15.2462388,5.30808809 15.6344967,5.37260085 15.8602388,5.64950495 C15.9785304,5.79800076 16.0329385,5.98799536 16.0113373,6.17714498 C15.9897361,6.36629461 15.8939207,6.53887938 15.7452455,6.65643564 L15.7452455,6.65643564 L11.6320212,9.98019802 C10.5861526,10.8280382 9.09540423,10.8280382 8.0495356,9.98019802 L8.0495356,9.98019802 L3.92746572,6.65643564 L3.8513546,6.58355583 C3.61891283,6.32594359 3.59998262,5.92999594 3.821318,5.64950495 C3.93770999,5.50163353 4.10816526,5.40703103 4.29443312,5.38692655 Z"></path></g></svg>
</label>
<input name='uri' type='hidden' value='ArlinaCode'/>
<input name='loc' type='hidden' value='en_US'/>
</form>
</div>
</div>

Replace all codes marked with Arlinacode with your blog's feedburner ID

4. After that click the Save theme button and see the results.


Additional


Change the ID of the newly created widget for the Newsletter widget, for example the new widget ID has an ID HTML1then replace that ID with HTML98

Dan this for the Partner widget in the Sidebar, add the code below before</head>

<style>
/* Partner Sidebar */
.sidebar512{max-width:300px;margin:auto;text-align:center;display:block;font-size:0;background-color:#fff}.sidebar12{color:#294db4;width:128px;height:33px;line-height:30px;display:inline-block;border-radius:22px;margin:6px;border:2px solid;transition:all .1s}.sidebar12:hover{background:#294db4;color:#fff;border-color:#294db4;box-shadow:0 2px 0.8rem -0.8rem rgba(0,0,0,0.8),0 0 0 1px rgba(0,0,0,0.05)}.sidebar512 a{color:#294db4;margin:auto;text-align:center;font-size:14px;font-weight:500;padding:5px 16px;border-radius:3px;transition:all .1s}.sidebar12:hover a{color:#fff}
</style>

Add New HTML / JavaScript widget in Layout> Then add below markup in it.

<div class="sidebar512">
<div class="sidebar12 onet"><a href="#" title="Visit the Site" rel="nofollow noopener" target="_blank" class='ripplelink'><span>Your Site</span></a></div>
<div class="sidebar12 onar"><a href="#" title="Visit the Site" rel="nofollow noopener" target="_blank" class='ripplelink'><span>Your Site</span></a></div>
</div>

This is the tutorial on How to create Subscription widget on Blogger? Hopefully useful and greetings.

Labels: ,

Monday, 3 May 2021

Stylish Delay Image Loading on Blogger.

#Stylish Delay Image Loading Before Scroll Down Pages in Blogger.


Stylish Delay Image Loading Before Scroll Down Pages in Blogger.


One of the factors that contribute to the loading load on a blog is image content, here CNL OFFICIAL will provide tips on How to add stylish delay loading images before scrolling the page on Blogger in 2021.

#What is Stylish Delay Image Loading on Blogger?


Delaying Image Loading Before Scrolling Pages here is when loading a page the image will not be loaded until we scroll the page and it will increase the speed of the Blogger.


#Stylish Delay Image Loading Before Scrolling Pages


First, open Blogger > Click the Themes menu > Click Edit HTML and Backup Your Template> Then find and add the code below before </body>

Code 1

<script>
//<![CDATA[
// LazyLoad
function loadScript(d){var o=document.createElement("script");o.src=d,document.body.appendChild(o)}function downloadJSAtOnload(){loadScript("https://cdn.jsdelivr.net/gh/Arlina-Design/phantom@master/lazyarlinas.js")}window.addEventListener?window.addEventListener("load",downloadJSAtOnload,!1):window.attachEvent?window.attachEvent("onload",downloadJSAtOnload):window.onload=downloadJSAtOnload;
//]]>
</script>

For friends who have already added the Lazysizes code, just replace the code with this version of

Code 2

<script>
//<![CDATA[
// Lazysizes
var lazysizer=!1;window.addEventListener("scroll",function(){(0!=document.documentElement.scrollTop&&!1===lazysizer||0!=document.body.scrollTop&&!1===lazysizer)&&(!function(){var e=document.createElement("script");e.type="text/javascript",e.async=!0,e.src="https://cdn.jsdelivr.net/gh/Arlina-Design/phantom@master/lazysarline.js";var a=document.getElementsByTagName("script")[0];a.parentNode.insertBefore(e,a)}(),lazysizer=!0)},!0);
//]]>
</script>

Select one of the codes above

The application is almost the same as in the post about Lazysizes, you only need to find everything imgin the theme. The code will look like this:

<img...

Example :

<img src='//www.blogger.com/img/icon_delete13.gif'/>

Add class='lazy'for Code 1 and class='lazyload'for Code 2 to the markup like this:

<img class='lazy' data-src='//www.blogger.com/img/icon_delete13.gif' src='data:image/png;base64,R0lGODlhAQABAAD/ACwAAAAAAQABAAACADs='/>

Change src to data-src  and add

 src='data:image/png;base64,R0lGODlhAQABAAD/ACwAAAAAAQABAAACADs='after data-src

Or for this example:

<img expr:alt='data:post.title' expr:src='resizeImage(data:post.firstImageUrl, 280, &quot;300:200&quot;)' height='186' width='280'/>

So like this :

<img class='lazy' expr:alt='data:post.title' expr:data-src='resizeImage(data:post.firstImageUrl, 280, &quot;300:200&quot;)' height='186' src='data:image/png;base64,R0lGODlhAQABAAD/ACwAAAAAAQABAAACADs=' width='280'/>

Do the above for all the img markup on the theme. What if the img markup already contains a class? Then you only need to add lazy or lazyload after the first class, for example:

<img class='blogger lazy' data-src='//www.blogger.com/img/icon_delete13.gif' src='data:image/png;base64,R0lGODlhAQABAAD/ACwAAAAAAQABAAACADs='/>

When finished, save the theme and see the results on your blog.


Next, to increase the Expires headers section that you can check on GTmetrix, you need to replace the s1600 and s640 in the image link in the post editor. Examples like this:

<div class="separator" style="clear: both; text-align: center;">
<a href="https://blogger.googleusercontent.com/img/b/R29vZ2xl/AVvXsEhOQzyWJ7sVC1Pf_PgilDoeXAtNY-2FJ_cDrupHdeXRERIDRVc8sXJ7yYg0o10G5tHgE1K091reUYzK7lb8IQP86N4sfjsJc9fnlsrDDlImGkK4vT8zePTbARWUU_9izyChvcWOQS0lfQQM/s1600/Cara+Memasang+Widget+Newsletter+di+Blogger.png" style="margin-left: 1em; margin-right: 1em;"><img alt="Cara Memasang Widget Newsletter di Blogger" class="lazyload" style="border: none;" data-original-height="800" data-original-width="1200" height="426" src="https://blogger.googleusercontent.com/img/b/R29vZ2xl/AVvXsEhOQzyWJ7sVC1Pf_PgilDoeXAtNY-2FJ_cDrupHdeXRERIDRVc8sXJ7yYg0o10G5tHgE1K091reUYzK7lb8IQP86N4sfjsJc9fnlsrDDlImGkK4vT8zePTbARWUU_9izyChvcWOQS0lfQQM/s640/Cara+Memasang+Widget+Newsletter+di+Blogger.png" title="Cara Memasang Widget Newsletter di Blogger" width="640" /></a></div>

Add -rw in each post image

<div class="separator" style="clear: both; text-align: center;">
<a href="https://blogger.googleusercontent.com/img/b/R29vZ2xl/AVvXsEhOQzyWJ7sVC1Pf_PgilDoeXAtNY-2FJ_cDrupHdeXRERIDRVc8sXJ7yYg0o10G5tHgE1K091reUYzK7lb8IQP86N4sfjsJc9fnlsrDDlImGkK4vT8zePTbARWUU_9izyChvcWOQS0lfQQM/s1600-rw/Cara+Memasang+Widget+Newsletter+di+Blogger.png" style="margin-left: 1em; margin-right: 1em;"><img alt="Cara Memasang Widget Newsletter di Blogger" class="lazyload" style="border: none;" data-original-height="800" data-original-width="1200" height="426" src="https://blogger.googleusercontent.com/img/b/R29vZ2xl/AVvXsEhOQzyWJ7sVC1Pf_PgilDoeXAtNY-2FJ_cDrupHdeXRERIDRVc8sXJ7yYg0o10G5tHgE1K091reUYzK7lb8IQP86N4sfjsJc9fnlsrDDlImGkK4vT8zePTbARWUU_9izyChvcWOQS0lfQQM/s640-rw/Cara+Memasang+Widget+Newsletter+di+Blogger.png" title="Cara Memasang Widget Newsletter di Blogger" width="640" /></a></div>

Please note, if my friend has added -rw in each post image. The image will not be read by 3rd party widgets such as Recent Post, Random Post widget, etc. Unless you readjust the third party code with the new image format.

Okay, that's it from CNL OFFICIAL on Stylish Delay Image Loading Before Scrolling the Page . Hopefully useful and greetings.

Labels: ,

Tuesday, 27 April 2021

How to Get better Results in YouTube in 2021.

 Get Better Results on YouTube in 2021.


Get Faster Top Results in YouTube.


If you have been struggling with your YouTube results for a while now, then you are definitely not the only one. Just as Instagram has grown exponentially over the last few years, so has YouTube, which means that there are now more people than ever trying to become YouTubers and make it big.

While this doesn't mean that you have to give up completely and throw away your YouTube channel, it does mean that you have to be strategic about how you grow it. Let's take a look at how to get better results on YouTube so that you can connect with the right community.

#Create Video Transcripts

There have been many discussions online about video transcripts for YouTube and whether they help you get better results.

The reality is, there are a lot more YouTube channels these days that are catering to international audiences and disabled people by captioning their videos. Of course, this is going to take a lot more of your time, bus it's definitely going to expand your reach, and help you organically rank better on YouTube.

Industry experts say that if you have captured your videos with a transcript, YouTube will rank your content better so that more people can see it. If you've got the time to put into captioning your videos, then we highly recommend it to get better results on YouTube. 

#Provide Educating and Entertaining Content

While you might have found your passion within your niche, and you are more than happy just to create content that you love, if that content isn't capturing your audience's attention, then you're not going to be able to get better results on YouTube.

These days, your video content needs to be able to provide value to the viewer, and this can come in many forms. Whether it's teaching them how to understand or do something or simply entertaining them, the more value that your content can offer your audience, the better results you will get.

#Make the Most of Viral Trends

If you have a TikTok account, then you will know how relevant viral trends are to getting more results with your content. The same goes for YouTube - if you create video content that piggybacks off of existing viral trends, then you will be more likely to do well.

Of course, there is a huge number of people on YouTube already that are looking for specific content based on viral trends, so if you are creating content that falls into this category, there's a good chance that you will get better results.

However, just make sure that you hit the trend at the right time, otherwise, you might put out content for a viral trend that has just peaked, and people aren't really interested in it anymore.

#Get Help from a Third Party

Whether you want to get better results for your YouTube channel or not, you might not have more time to put into it.

Most of us still have a day job as well as our pipeline dream of being a YouTuber, which means that you have to work on it after hours. If you are already feeling overwhelmed with growing your YouTube channel, then you might want to consider outsourcing some of your engagement to industry professionals.

There are lots of options out there when it comes to the YouTube growth industry, and the best part is that you can save time. It also means that you don't have to focus as much attention on your engagement strategy and instead put this focus into your content. It’s easy to buy YouTube views. Consider SidesMedia or UseViral for their reputation and reliability. 

#Invite Guest YouTubers

How many YouTubers do you currently follow within your niche? How many of these YouTubers are you hoping to one day be able to collaborate with? While you might feel that your channel is not up to snuff yet, there's no reason why you can't reach out to them and try your luck.

One of the best ways to get better results on your YouTube channel is to team up with other YouTubers out there and get them to feature on your channel. Not only will you expand your reach to another audience, but you will show them that you have some serious social proof. 

#Final Thoughts

Getting better results on YouTube is more difficult than you might think, but it's not impossible. If you really want to stand out on the internet's most popular video-sharing platform and connect with an audience who is going to love your content, make the most of the suggestions we have above.

Remember, the more that you put into your YouTube channel, the more you will end up getting out of it. Good luck!

Labels: , ,